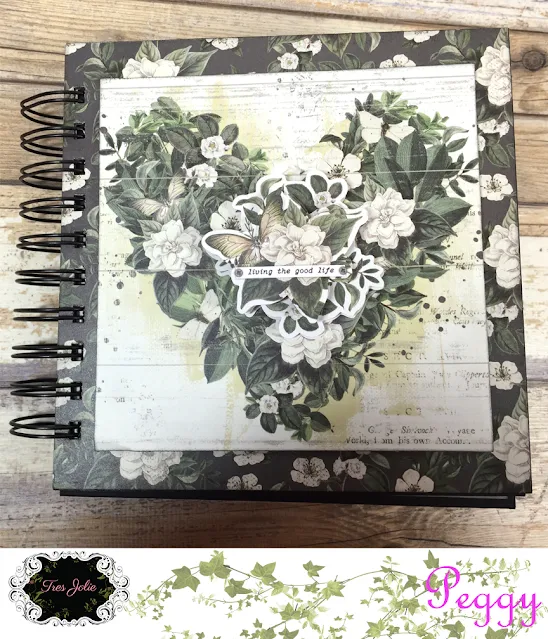
The January Cards, Tags and More Kit comes with several items from the Simple Stories collection: 6x8
paper pad, a sheet of cardstock stickers and a set of layered stickers, along
with flowers, resin embellishments and 4 6x6 black chipboard squares – all you
need to make a mini album! Here’s what I came up with:
And here’s a
walk-through, along with a few explanations of how I fashioned the different
elements.
I decided to use
two of the chipboard squares to form the covers and to use black cardstock from
my stash to make the bases for my pages, saving the other two for a future
project.
I used glue throughout:
Beacon Fabri-Tac to attach the patterned paper to the bases and Art Institute
Glitter Glue (with a fine tip) to seal the pockets.
The pattern papers
were cut at 6” x 6” for the covers. All other papers were cut .25” x .25” less
than their bases to create black borders all around. I inked all the edges with
Black Soot Distress Ink.
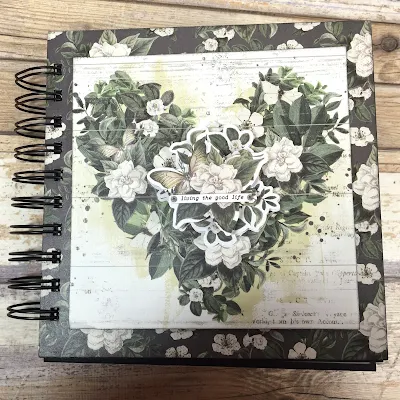
I chose to use one
of the darker patterns on the bottom to make that top image (backed with 2
layers of scrap cardstock) pop. My sole embellishment was one of the
dimensional stickers – it’s actually 4 layers high!
A doily from my
stash, then one of the journaling pieces from the paper pad, garnished with a
few bloom and a dimensional butterfly completes this page.
To create this
pocket, I cut the cardstock to 6” x 8.72” and scored it at 6”. I wanted my card
inserts to glide smoothly in and out, so the background paper is full size. I
added one of the cardstock stickers to embellish.
The black
cardstock was cut to 6.25” x 4.25” and folded in half. I added a journaling
piece and embellished it with a length of twine tied in a bow.
I cut a triangle measuring
7” x 5” and trimmed an inch off each end to form this pocket.
The black
cardstock was cut to 6” x 4.5” and topped with a scrap, then embellished with
several cardstock stickers and a twine bow.
I cut the
cardstock for this page to 6” x 9.5”, scored at 3.5”. I used a circle punch to create
a notch in the center. (I meant to make this page with the pocket on the side,
facing the middle. Somehow, I forgot this when I was assembling the album.)
The black
cardstock was cut to 8.25” x 5’, topped with a scrap and embellished with a
cardstock sticker and a twine bow.
I love making
waterfalls; they’re an easy way to add variety to my project. I simply cut a
piece of cardstock .25” longer than my patterned paper, score and fold at the .25”
and attach the pieces. Glue the first piece at the top, then the next just
below the bottom of the fold-over and continue the same procedure. Glue the
last piece flat against the base. I added one of the resin pieces that came in
the kit to the bottom of the first layer to hold it all down.
Next, I created a
fold-out page, using 2 pieces of the black cardstock as follows: Cut to 6” x
11” and score at 6”. Cut the next piece to 6” x 9.5” and score at .5”, and
5.25”. Glue the first piece to the second at the .5” fold.
Here’s what I did
with the various pages:
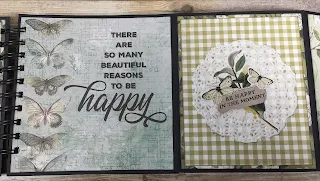
One of the patterned papers, trimmed to fit the sentiment to the page.
A few more layers
(love that checked paper!), a doily and a couple of cardstock stickers.
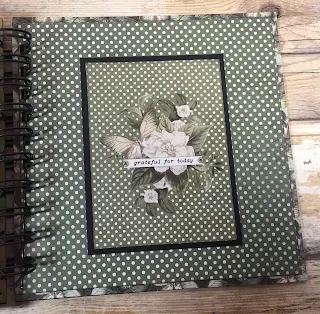
Layers (note the
dots on the bottom) and a dimensional sticker.
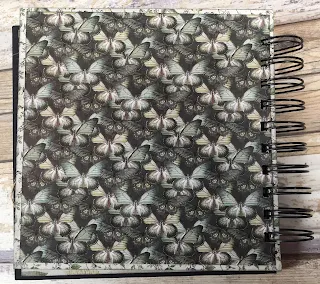
I couldn’t figure
out how to use this large check as a base, but it works perfectly as a banner
piece. I added a cardstock sticker to the center.
This is one of the
chipboard butterflies. I left it raw; it fits the rustic feel of the papers.
A few layers, each cut .25” inches smaller than the bottom layer, then a
journaling piece and a cardstock sticker.
Another notched pocket.
And another
chipboard butterfly with a doily base.
A side pocket…
And a couple of cards in a bottom pocket.
This is the inside
of the back cover, with contrasting layers…
And the back. I always
leave this plain because of the wear and tear to come.
A word about the
binding. I bought a Bind-It-All on sale some time in the past and it gathered
dust because I never figured out how it worked. I finally said “Enough!” and
found a series of videos on YouTube that showed me just how easy it was to use
this thing. This mini album can be bound with metal rings; just punch the holes
carefully to make sure the pages match.
***And now a word
about this project: This will be my final project as a member of the Tres Jolie
Design Team. I want to thank Kim for all the amazing kits and all of my fellow
designers for the inspiration and encouragement over the past year. It has been
such a pleasure to have worked with these amazing ladies.***
***************************************************
*****Supplies*****
***Très Jolie Cards, Tags and More Kit***
Simple
Stories – Simple Vintage Weathered Garden Collection – 6 x 8 Paper Pad #16719
Simple
Stories – Simple Vintage Weathered Garden Collection – Cardstock Stickers
#16701
Simple
Stories – Simple Vintage Weathered Garden Collection – Layered Stickers #16727
49
and Market – Handmade Paper Flowers – Rustic Blooms – White Heron #RB-34925
Tres
Jolie – Laser Cut Chipboard – Open Butterfly Set
Tres
Jolie – Chipboard – Black Mini Album Pages – 6 x 6
Melissa
Frances – Resin Embellishments – Victorian Flowers #CX879
***Other***
Core’dinations –
Premium Cardstock – 8.5 x 11 – Black Cat #GX-2200-02
Nicole’s Kitchen –
Paper Doilies – 4” #BAK10402
May Arts – Jute
#SM-10
***Mediums***
Ranger Ink –
Distress Ink Pad – Mini – Black Soot
***Tools***
EK Success –
Nesting Punch – Circle – 3/4”
Zutter – Bind-It-All
Zutter – Black
Binding Wire – 1”
***************************************************
As always, I want
to thank you for peeking into my blog; your visits mean a lot to me.
Don’t forget that
Tres Jolie can be found in the following places:
Facebook:
Instagram:
Tres Jolie website:
Tres
Jolie subscriptions:
Tres
Jolie blog:
Tres Jolie YouTube:
Pinterest